Return to the tutorials
Camera Curve Calibration
A lot of digital cameras are sufficiently different from a gamma 2.2 mapping
that we need to explicitly derive their “Camera Response Curves”. We do this
through a process called “Camera Response Curve Calibration”. It’s pretty
simple really. You take several images of a scene at known exposures. The
closer the exposures the better. I’d recommend ½ to ¼ stop
increments, though it works ok with the standard 1 stop increments on most
cameras. If you use a good exposure (that has both saturated regions, black
regions, and stuff in between), the calibration can work with as little as
two images, but in most cases you probably want to get four or five images
to get a good curve. Once we have these images, we start up the Curve Calibrator
in HDR Shop, which is under the Create menu as "Calibrate Camera
Curve":
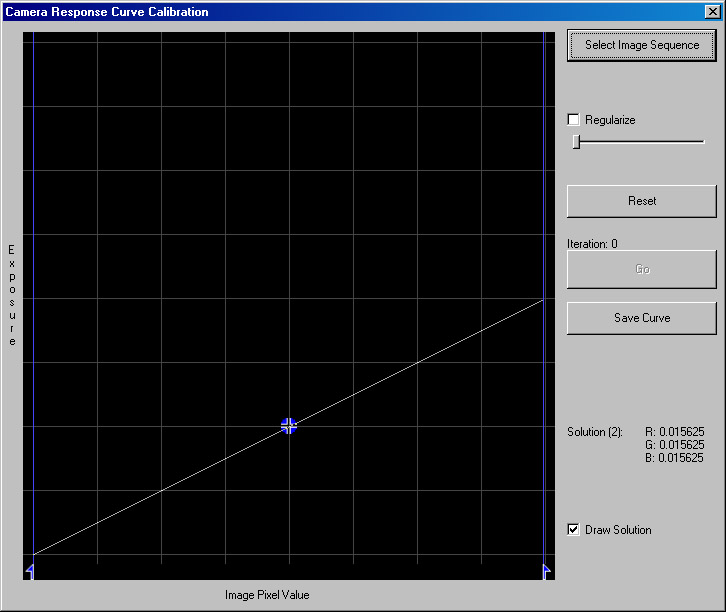
To specify your calibration images, click on the "Select Image Sequence"
button. The "Select Calibration Image Sequence" dialog box will open:
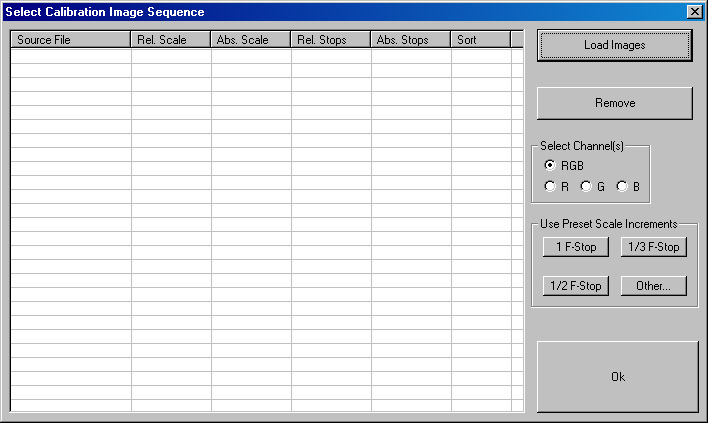
Click on the Load Images button to select files to add to your sequence.
Loaded files are sorted automatically based on the "sort" column, which initially
stores the average pixel value. You can change the values in that column
to rearrange the files if they are not in the correct order.
Now you need to enter an exposure for each image in the sequence. You can
enter the data in four different formats, corresponding to the four different
columns. "Abs. Stops" for example, is the exposure of each image in absolute
stops. "Rel. Stops" is the exposure difference in stops relative to the previous
image. The scale columns store values in terms of their linear scale multiplier.
If the entire sequence is taken at a certain stop increment, you can choose
one of the "Preset Scale Increments".
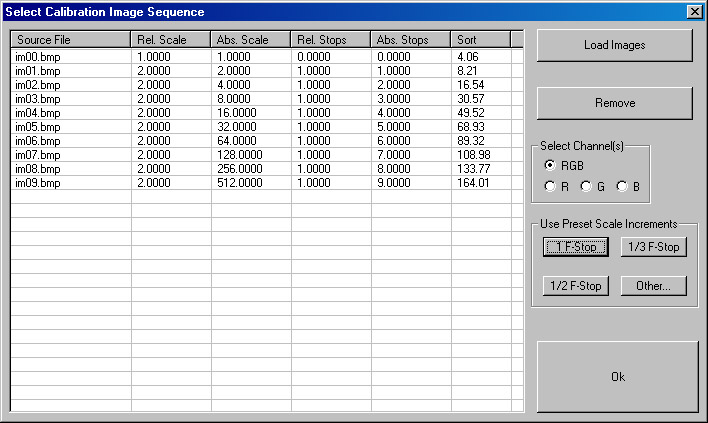
If you accidentally select and open the wrong files you can simply highlight
them and click the Remove button.
By default, you are entering values for all three channels (Red, Green and
Blue) simultaneously. If you want to enter different values for each channel,
you can select R, G, or B in the "Select Channel(s)" box to enter values
there. This is mainly useful if you are using filters to control the exposure
level, as even supposedly "Neutral Density" filters are not always entirely
neutral (that is, they tend to block more blue light than red light).
Once all the information on the images that make up the sequence is correct
press the Ok button. The image data will be loaded and you will be returned
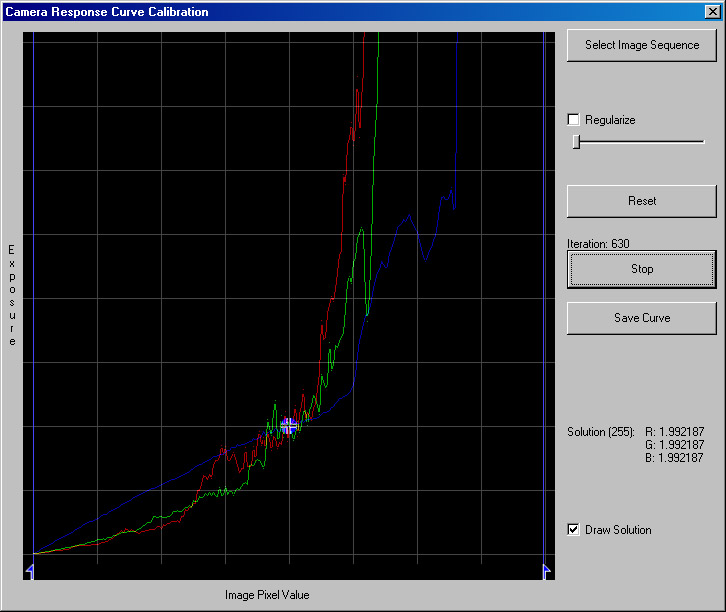
to the Calibrate Camera Response Curve dialog box. At this point, you can
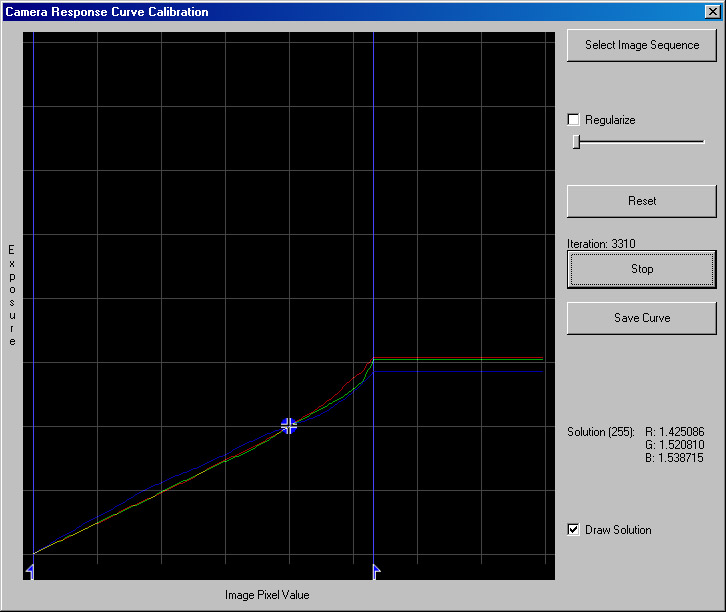
start the iterative solver by pressing the "Go" button.
The blue crosshairs in the middle allow you to control the scale on the curve.
It has no effect on the solver, it just lets you inspect different areas
of the curve.
You can choose the valid pixel range by moving the blue arrows at the bottom
of the graph. In this case, the camera is clamping pixels at a very low value
of around 160, which is confusing the solver somewhat. If we move the right
arrow down to ignore values greater than 160, the curve collapses into a
good solution:
If need be, you can apply a regularization factor (i.e. smoothing) to the
curve to get rid of any bumps that you think are not part of the actual curve.
Simply click the 'regularize' checkbox to turn on smoothing, and adjust the
degree of regularization with the slider:
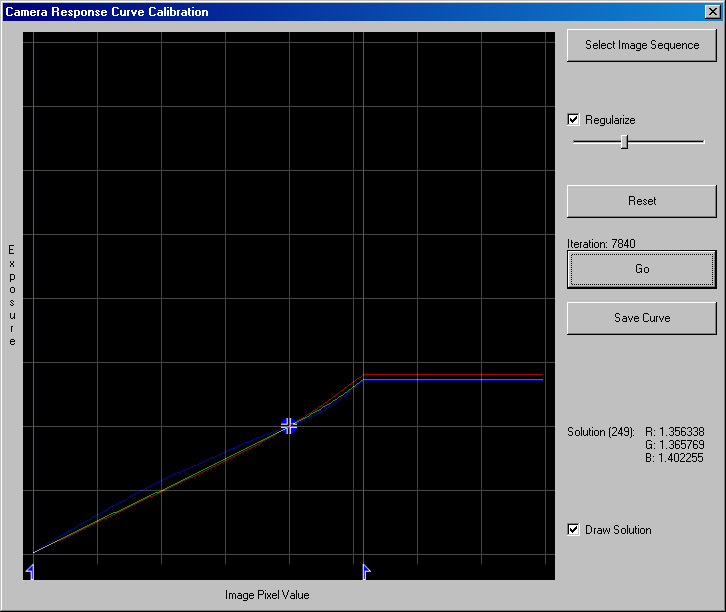
Once you have a curve you like, you can stop the solver and save the curve
to a file for later reference.
Return to the tutorials